A Step-by-Step Guide to Rubber Cement Tube Repair: Fixing Punctures with Ease
When you are out riding, a punctured tyre can ruin your day and lead to unexpected delays. But don't worry, luckily there is a solution. With a reliable rubber cement tube repair, your vehicle can get back on wheels safely and quickly.
This guide will help you fix punctures using a puncture tyre repair kit. You'll learn about the important tools needed, specific steps to repair, and some tips on how to successfully repair the punctures.

Read on.
Learning about fixing rubber cement tubes
Rubber cement is a specific type of adhesive that was primarily manufactured to glue together rubber materials. It is the key bonding agent with tyres, which delivers a secure, long-lasting seal. Repairing punctures with rubber cement offers excellent sticking power that has been extremely useful for challenging areas like tyres.
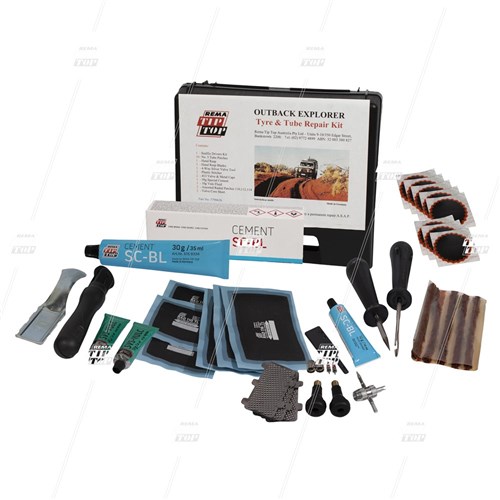
The kit usually involves rubber glue, patches, and other important tools that may be required for puncture tyre repair. All this equipment will save you time and money since it will be possible to have the tyres fixed at home. In this guide, we will be focusing on how to use rubber glue well for tube repairs.
Tools You Will Need
Before you begin fixing things, make sure you have these tools and materials:
- Puncture Tyre Repair Kit: This kit should comprise rubber cement, rubber patches, a tyre lever, and possibly sandpaper.
- Tyre Lever: This tool helps you take the tyre off the wheel without hurting it.
Sandpaper: Applied to sand the surface of the puncture site for better adhesion. Clean Cloth: Wipe the area around the hole so it sticks well.
Step-by-Step Repair Process
Step 1: Remove the Tyre
Start by removing the tyre from the rim. Using your tyre lever, pry it off from one side, being careful not to distort the tyre or the rim. Once you have taken off one side of the tyre, you should now be able to pull out the inner tube. Inspect the tyre for any other holes while it is removed.
Step 2: Find the Hole
Inflate the inner tube a little to trace the puncture. Find the holes or listen to this tube for hissing of air. If you cannot see it, submerge the tube in water. Bubbles will appear around the puncture, indicating where the damaged area is. Mark that with a marker or chalk so you may easily locate it.
Step 3: Preparation of the Surface
Before applying the rubber cement, you have to prepare the whole area. Make that whole spot around the puncture all roughened using some sandpaper. This helps ensure better sticking. Then, clean off the dirt, dust, or even moisture that may hurt the sticking of the cement using a cloth.
Step 4: Apply Rubber Cement
Open the rubber cement tube from your tyre repair kit. Spread good amounts of rubber cement both on the puncture area and around it. Follow the manufacturer's indications about how many to use. Apply evenly so that it will stick well.
Step 5: Apply the Patch
Wait for the rubber cement to dry for approximately five minutes. Taking a patch from your repair kit, place it over the hole and press down firmly. This will push out the air bubbles and create a tight seal. Follow the patch makers' instructions to get the best result. Ensure that the patch completely covers the hole and sticks well to the surrounding rubber.
Step 6: Let It Cure
Let the repair dry according to the rubber cement's instructions. Drying times vary with products. So, be sure that your patch is well and firmly stuck before proceeding. This step is important in ensuring your repair lasts a long time.
Step 7: Reassemble the tyre.
Now, after the patch is dry, let's put the tyre back together. Put the inner tube inside the tyre gently, ensuring the position is correct and without any twists or pinches. Then, fit the tyre back onto the rim using the tyre lever to check if it is in the right lined-up condition.
Step 8: Inflate the Tyre
Pump up the tyre to the pressure indicated on the side. Use a pressure gauge to make sure it is proper. To check for leaks, plunge your hand into the patch area or place it back in the water to see if there are bubbles made.
Step 9: Final Check
Finally, in your pre-ride inspection, make sure to check that the tyre is well seated and that there are no apparent defects. If all these criteria are met, the vehicle is good to go!
FAQs
- What purpose is rubber cement tube repair used for?
Using rubber cement tube repair, holes in the inner tubes can be repaired. Therefore, it is perfectly designed for bicycles, motorcycles, and other wheeled vehicles that possess inflatable tyres.
- How does one know that the inner tube has a hole?
Inflate the tube and listen for escaping air, or insert the tube into some water and watch for air bubbles emerging at the hole.
- Is rubber cement safe to use on tyres?
Yes, rubber cement is safe if applied according to the package, which ensures it will bond strongly to do the job.
Final Thoughts
In conclusion, with a puncture tyre repair kit and knowledge, you can perform rubber cement tube repair hassle-free. By following the easy steps, you'll ensure that your tyres remain reliable and ready to run on the road. If you are looking for quality products for your work, you can consider Rema Tip Top's range of rubber and repair solutions. Get started today and enjoy a calm and relaxing ride!
